If you told QuickBooks during the setup process that you want to track unpaid bills, also known as accounts payable, you can enter bills as you receive them. As you do this, QuickBooks keeps track of the unpaid bills.
| Tip | Good, accurate recordkeeping of unpaid bills, or accounts payable, is essential if you want to do good accrual-basis accounting. Accrual-basis accounting produces more accurate financial statements than other methods. |
If You haven't Previously Recorded an Item Receipt
To enter a bill, you follow one of two sequences of steps. If you're entering a bill for which you haven't previously recorded an item receipt, you follow these steps:
-
Choose the Vendors ð Enter Bills command.
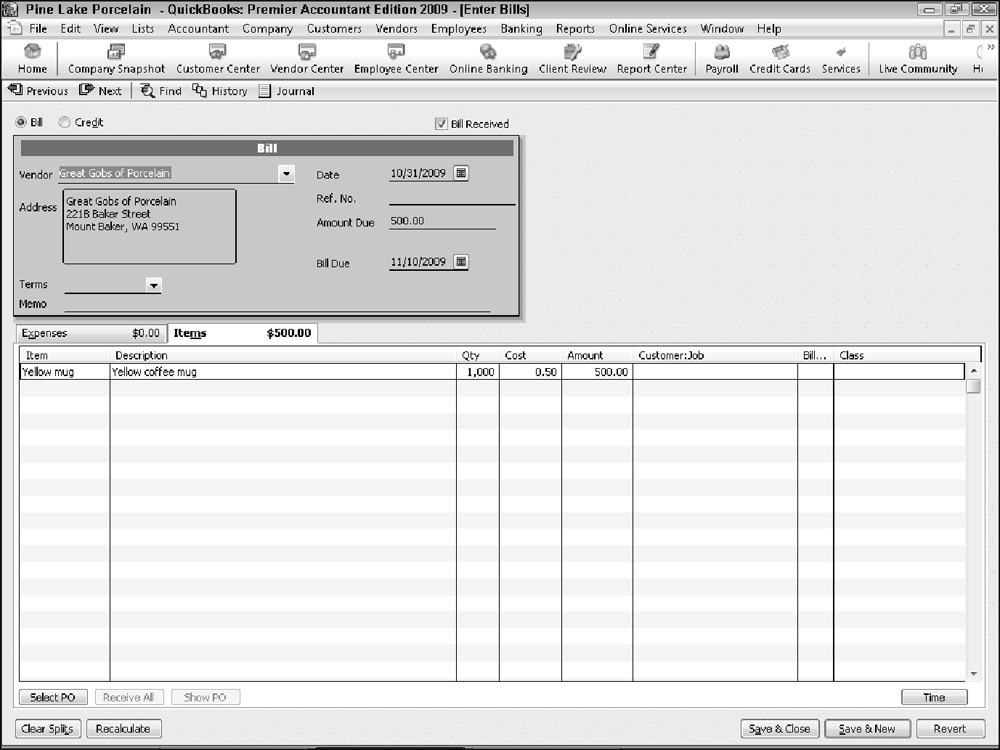
QuickBooks displays the Enter Bills window, shown in Figure 1. You'll use this window to describe the bills that you later need to pay.
-
Use the Vendor drop-down list to identify the vendor.
-
Use the Date, Amount Due, and Bill Due fields to describe the invoice date, the invoice due date, and the invoice amount.
Optionally, use the Terms drop-down list to identify the payment terms and the Ref. No. box to identify the vendor's reference number. Next, if you want to, go ahead and provide a memo description for the bill by using the Memo box.
-
Identify the expenses billed.
Use the Expenses tab of the Enter Bills window to identify the expenses that the bill represents. To identify expenses, you supply the account number that should be debited, the amount, and, optionally, the memo, customer:job, and class information. The Expenses tab of the Write Checks window works the same way as the Expenses tab of the Enter Bills window.
-
Identify the items billed in the Items tab.
Use the Items tab of the Enter Bills window to describe any items for which the vendor bills you. For example, use the Item column to identify the thing that you purchased. Then use the Qty, Cost, and Amount columns to identify what the item cost. You can also use the Customer:Job column if you're tracking bills by customers. If you have questions about how to work with the Items tab, be aware that the Items tab of the Enter Bills window works in the same way that Items tabs of other QuickBooks windows work.
| Tip | The buttons at the bottom of the Enter Bills window — Select PO, Receive All, Show PO, Clear Splits, Recalculate, and Clear — work the same way as the similarly titled command buttons located at the bottom of the Create Item Receipts window |
If You Have Previously Recorded an Item Receipt
To enter a bill when you've already recorded the receipt of the item for which the bill invoices you, follow these steps:
-
Choose the Vendors ð Enter Bill for Received Items command.
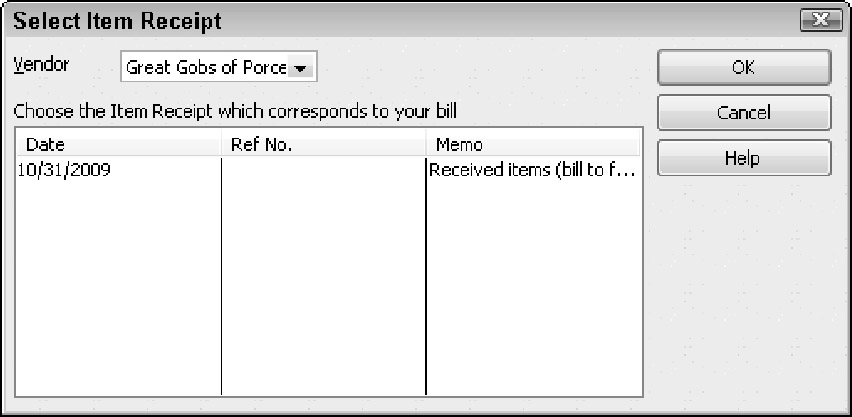
QuickBooks displays the Select Item Receipt window, shown in Figure 2.
-
To identify the item receipt for which you're now recording a bill, select the vendor from the Vendor drop-down list.
Then, when QuickBooks displays a list of item receipts for the vendor, click the item receipt that corresponds to your bill. Next, click OK. QuickBooks displays the Enter Bills window for the item. QuickBooks fills out much of the Enter Bills window by using the information from the item receipt, as shown in Figure 3.
Tip You may be able to skip Steps 3, 4, and 5 if your item receipt information correctly and completely fills the Enter Bills window.
-
Use the Date, Amount Due, and Bill Due fields to describe the invoice date, the invoice due date, and the invoice amount.
Optionally, use the Terms drop-down list to identify the payment terms and the Ref. No. box to identify the vendor's reference number. Next, if you want to, go ahead and provide a memo description for the bill by using the Memo box.
-
Use the Expenses tab of the Enter Bills window to identify the expenses that the bill represents.
To identify expenses, you supply the account number that should be debited, the amount, and, optionally, the memo, customer:job, and class information. The Expenses tab of the Write Checks window works the same way as the Expenses tab of the Enter Bills window.
-
Use the Items tab of the Enter Bills window to describe any items for which the vendor bills you.
For example, use the Item column to identify the thing that you purchased. Then use the Qty, Cost, and Amount columns to identify what the item cost. You can also use the Customer:Job column if you're tracking bills by customers. If you have questions about how to work with the Items tab, be aware that the Items tab of the Enter Bills window works in the same way that Items tabs of other QuickBooks windows work.


