If you use QuickBooks to keep track of the bills that you owe, you don't use the Write Checks window to record the bills that you want to pay. Rather, you tell QuickBooks to display a list of these unpaid bills that you've already recorded — and then you pick and choose which bills QuickBooks should pay and the bank account from which QuickBooks should write the check.
Follow these steps to pay bills in this manner:
-
Choose the Vendors ð Pay Bills command.
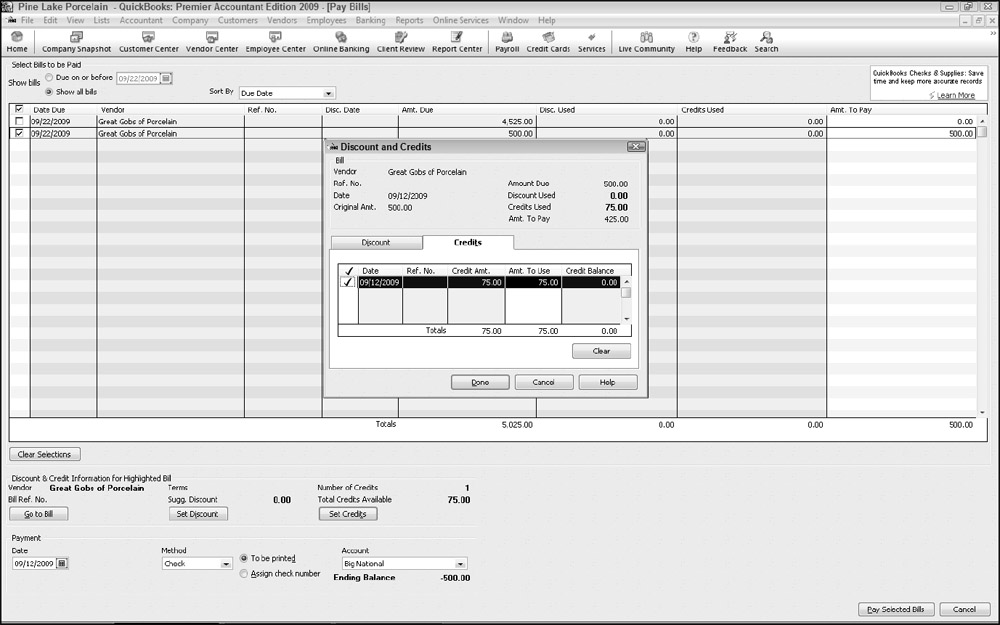
QuickBooks displays the Pay Bills window, shown in Figure 1. You use the Pay Bills window to describe the payment that you want to make.
-
Describe which bills you want to pay.
Use the Show Bills radio buttons at the top of the Pay Bills window to identify what you want to see. Select the Due On or Before radio button to show only those bills that are due on or before the specified date. To specify the date, enter the date into the Due On or Before date box. To see a list of all the bills that you have to pay, select the Show All Bills radio button.
Tip You can use the Sort Bills By drop-down list to select the order that QuickBooks uses for listing your bills. For example, you can sort bills by due date, discount date, vendor, and amount due.
-
Select the bills that you want to pay.
To select bills that you want to pay, click the check column. The check column is the leftmost column in the list of unpaid bills — it's headed by a check mark. When you click the check column, QuickBooks marks the bill with a check mark. The check mark tells QuickBooks that you want to pay that bill. To deselect a bill, click the check column again. QuickBooks removes the check mark.
-
(Optional) Review a specific bill.
You can review detailed information about a specific bill by first clicking the bill to highlight it in the list and then by clicking the Go To Bill button. When you do this, QuickBooks displays the Enter Bills window with the bill information. To close the Enter Bills window, click the Close button.
-
Set the discount and credit.
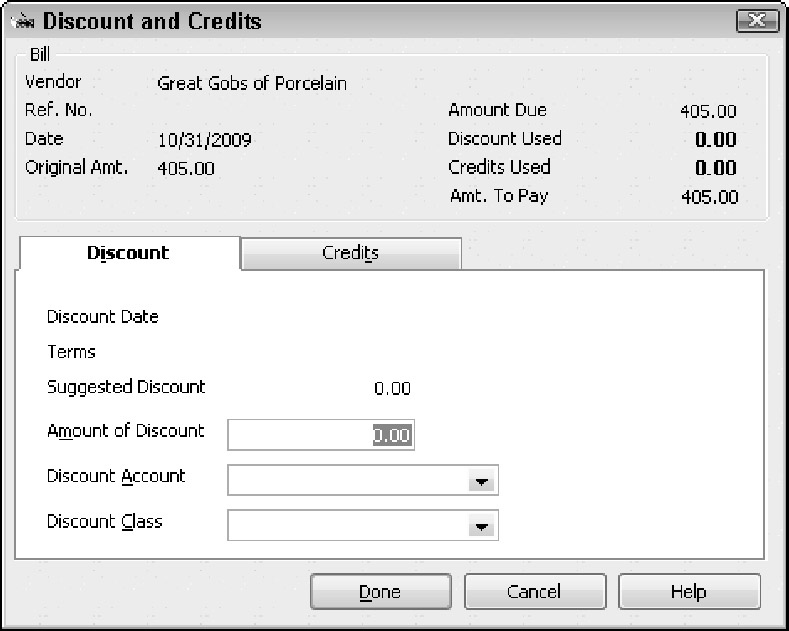
If you click the Set Discount button, QuickBooks displays the Discount tab of the Discount and Credits window, as shown in Figure 2. You can use the Discount tab to enter a discount amount for the bill. If you enter a discount amount for the bill, you also enter the discount account. This is the account that gets credited for the reduction — the discount — in the correct amount.
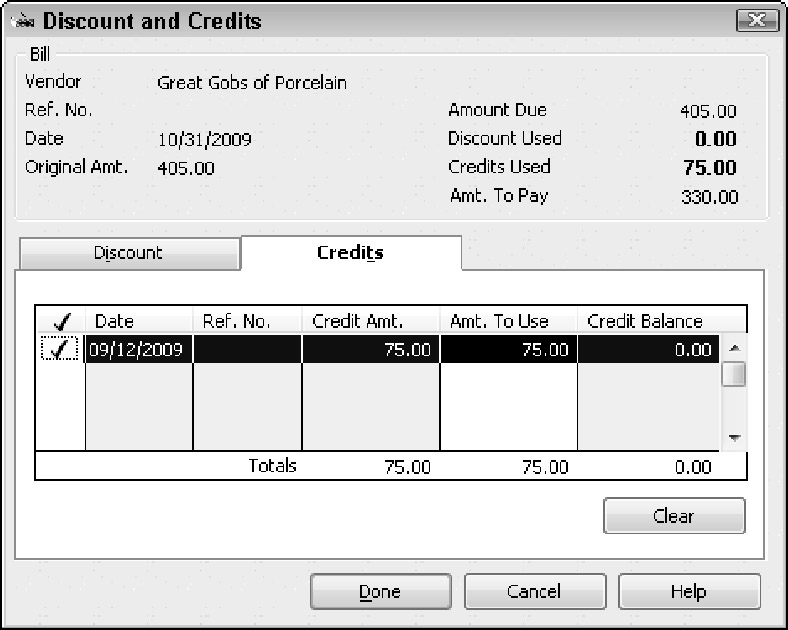
If you click the Set Credits button, QuickBooks displays the Credits tab of the Discount and Credits dialog box, shown in Figure 3. The Credit tab lists any credit memos from this vendor. To apply a credit memo to the amount due a vendor, click the Set Credits button. QuickBooks marks applied credits by placing a check mark in the marked column.
When you complete your work with the Discounts and Credits dialog box, click the Done button to close the dialog box and return to the Pay Bills window.
Tip Click the Clear button in the Discount and Credits dialog box to clear the applied credits shown on the Credits tab.
-
Use the Payment Account drop-down list to select the bank account to be used for making payments.
The ending balance for the bank account shows the Payment Account drop-down list.
-
Use the Payment Method drop-down list to select the payment method.
If you want to pay your bills by check, for example, select Check. Assuming that you'll print the checks in QuickBooks, select the To Be Printed radio button (otherwise, select the Assign Check No. radio button to have QuickBooks assign the next consecutive check number). You can also pay bills by other methods, such as by credit card and by online payment (if you're set up for online payment or online banking).
-
Use the Payment Date drop-down list to record the payment date that you want.
The payment date entry interacts with the payment method entry. The payment date that you set, for example, affects when an online payment gets made. The payment date also corresponds to the check date that is shown on printed checks.
-
After you select the bills that you want to pay and describe how you want to pay them, click Pay Selected Bills to pay the selected bills.
QuickBooks records the payment transactions in the bank account to pay the selected bills. QuickBooks also closes the Pay Bills window.
-
Complete your task.
You still need to print any unprinted checks necessary to pay bills if you are using checks to pay the bills. You also need to transmit any online payment instructions necessary to pay the bills if that's how you've chosen to pay the bills. If you're going to hand-write checks, you obviously need to hand-write the checks and then mail them out. In other words, all QuickBooks does at this point is record in the QuickBooks data file the payment transactions. It hasn't yet affected the transactions. You need to print the checks, send the online payment instructions, or hand-write the checks?


No comments:
Post a Comment